Hokey Coke so a few people have asked how to do the water droplets...i am by no means an expert and all i am going to do is pass on how my friend Michelle Cassell showed me...except she was much better..but hopefully it will give you a few ideas and encourage you to try something new :0)..I Practised on scrap paper until i felt confident enough to add them to my image...
Step 1
for my metalic flowers i used the following PM's - Denim Blue, Duck Egg, Grey Green, Tea Green..
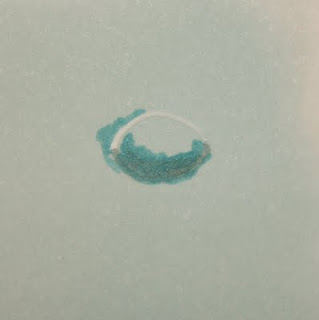
i started by colouring an area of scrap with tea green...i then used a white gel pen to create the top part of the droplet (this would be where the light hits it), and then added the bottom with grey green (as this will create the shadow and "ground" your droplet)
Step 2
next i fetched the grey green in a little further to create more of the shadow
Step 3
i then added duck egg this time fetching it further into the droplet and also to the outside to help give more definition...
Step 4
i then repeated this with denim blue again fetching in a little further and again a little more on the outside of the droplet
Step 5
i then repeated the process with tea green
Step 6
i went over the droplet with the white gel pen..this time adding a little to the inside bottom again where the light would hit...
Step 7
i then repeated the whole process..to build the colour up..obviously i was taking photo's inbetween and you will get a better result blending if you work quickly whilst the ink is still a little wet
Step 8
next i added a line of WG 5 to deepen the shaded area
Step 9
finally i repeated the colouring process again until i was happy (ish)..again going back over with the gel pen
this type of droplet would work on a flat surface..you would use the same technique for the ones rolling down the grass just changing the shape to a teardrop...these colours were just for the droplets on the flowers just change your colours to match whatever your colouring...
and my finished card in case you missed it first time :0)
as i said i am no expert but hope you've found this helpful..it's only the second tut i've ever done :0)
hugs Debs x


stunning card and just the most amazing droplet!
ReplyDeletevanessa xx
Thanks Debs and gorgeous card!
ReplyDeleteDeb your a gem, honestly this tutorial is priceless. I have already bookmarked your tut, I wasn't happy with my efforts, you really have learned me something new. Thank you so much xxxxx
ReplyDeleteThat tutorial is great, thank you! Love your card!!
ReplyDeletewow Debs I am impressed...that's very effective!!
ReplyDeleteFi
x
they look fab x
ReplyDeleteawesome work!! Thanks for the tutorial!
ReplyDeleteSammi
xx
Very cool Debs! Love your step-by-step pics! And your card is adorable! Viv xx
ReplyDeleteWhat a fabulous tutorial! Thanks so much for that.
ReplyDeleteThank you so much for visiting my blog, too!
Hi hun
ReplyDeletebrill tutorial, luv the water droplet it looks brill, gorgeous card, sue,x